Showing posts with label RECIPES. Show all posts

Wednesday, January 8, 2014

Millionaire's Shortbread & 2 Nifty Ideas

Today I’ll be sharing the way to my husband’s heart… and it is definitely by making 
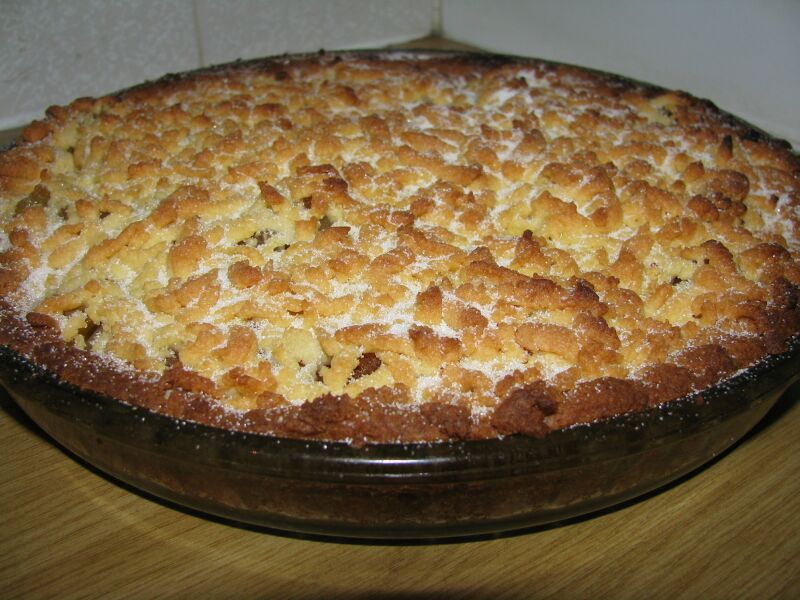
Millionaire’s shortbread.  It is his all time favourite after dinner treat to have with a lovely cup of brewed filter coffee.

Millionaires Shortbread


Shortbread Recipe:
225g Cake Flour                      
225g Butter                             
100g Castor Sugar                                      
100g Maizena

1.  Preheat the oven to 150C.  Grease a 20cm x 30cm x 2,5cm (deep) tin.
2.  Make the shortbread:  Mix all ingredients, fits into a small baking tray. (Or two round cake tins for plain shortbread)  Place in deep freeze 10 - 15 minutes then bake for 1 hr.  Careful not to burn - golden brown.  Sprinkle with Castor sugar when they come out of the oven or coat for Millionaire’s Shortbread
3.  Millionaires caramel: 
385g Can Condense Milk
30ml (2T) Syrup
80g Butter
Heat slowly and then increase heat very slightly till mixture is bubbling and cook 5 – 6min until caramely.  Spread over slightly cooled shortbread and put in fridge to set before spreading on the chocolate topping.
4.  Millionaires topping:
180g Slab of Cadbury Chocolate
 Place the chocolate in double boiler until melted.  You can melt the chocolate in the microwave but be sure to stop the microwave often (say every 10 – 20 seconds) to avoid the chocolate burning.  Spread over caramel and leave to set in fridge for 1 hour.

Some millionaires’ tips:
1.      You can replace the Caramel with the ready to use version but it does seem to have a bit of a watery consistence to it which makes the shortbread not so crispy.
2.      Use only Cadbury’s Chocolate, the other makes of chocolates do not melt as well and taste as good!  Do not, I repeat, do not use cooking chocolate for goodness sake that will taste just awful!

                  ~ ~ ~ ~ ~ Cut into squares and Serve to impress!! ~ ~ ~ ~ ~
Lacy Trimmed Jersey
On a little outing today I noticed a lovely green jersey in one of my favourite stores.  I never buy from them unless they are having a serious sale but love looking anyway.  This little green jersey, a light weight jersey had this beautiful lace trimming.  The jersey was retailing for R480!!  It got me thinking that if you found a plain jersey (any colour of your choice), you could pretty it up with a cute lace trimming along the inner edges.  When I do find a jersey to do this exercise with, I will report back to you and lets’ see the savings! $$$!


I saw this sweet heart on a Facebook post, what a lovely idea, should be easy to make!!Y

Saturday, August 18, 2012

Plumberry Jam


BOTTLED STRAWBERRY JAM

Making Strawberry and Plum Jam OR Plumberry Jam

1.  Wash the strawberries and remove the stems.
2.  Weigh the fruit and use equivalent  Sugar for fruit weight. (Eg 500g Sugar to 500g Fruit)

3.  Place the fruit and sugar in alternate layers in a saucepan.  Leave overnight.
4.  Heat slowly, stirring occasionally, until all the sugar has dissolved.  Do not boil before all the sugar has dissolved.
5.  Boil for 20 minutes, turn of heat, blend with hand blender if finer jam is required.

6.  Cook for further 10 minutes.
Test the jam.  Jam should fall from spoon in flakes and not in separate drops.
Jam should be thick when cold.

PLUM JAM

Method as for Strawberry Jam.


PLUMBERRY JAM

Method as for Strawberry Jam.  Can go half plums, half strawberries or even 2/3rds plums and 1/3rd strawberries.

When plum /Strawberry jam is made, the taste is sweet with a hint of strawberries, very nice!

Thursday, May 10, 2012

Chocolate Swiss Roll

Ingredients:
200ml Flour
45ml (3Tbs) Cocoa
10ml (2 tsp) Baking Powder
Pinch Salt
4 Eggs
15ml (1 Tbs) Lemon Juice
25ml (5 tsp) Water
200ml White Sugar

Chocolate butter icing:
Cream together 1/4 Cup butter, 1 Cup Huletts Icing Sugar & cocoa to desired colour.

Preheat the oven to 200C.


1. Grease and line a 22cm x 35cm Swiss roll pan.
2.  Sift together the flour, cocoa, baking powder and salt.
3.  Beat the eggs until light and foamy, then beat in the lemon juice and water.  Add the sugar gradually and beat to dissolve.  The mixture should be very thick and pale.
4.  Sift the dry ingredients over the egg mixture and fold in lightly with a spatula.
5. Pour the batter along into the prepared tin.  Level lightly if necessary.
6.  Bake for 10 - 12 minutes, then turn out onto a slightly damp cloth and pull the paper off carefully.  Cut off the crisp edges to make the rolling easier.
7.  Roll up and wrap in the cloth.  Leave for a minute or two, and then remove the cloth and allow to cool on a cooling tray.  Spread a thin layer of the butter icing over the cake before rolling up again, and decorating as desired.

Here is a little story to go with my ever delicious Swiss Roll Cake. 

I have always been a keen baker, my aim to always find the best chocolate cake recipe ever, the surprisingly quick and easy, yet delicious recipe, new recipes, new flavours and so on.  Well, some years back, we talking about 13 years back,  I tried out a Swiss Roll recipe and after the biscuity result, shelved making Swiss Roll for a long time.  I then came across this recipe and said, "Swiss Roll Recipe, I'm going to conquer you!".  Well I did and my Swiss Roll turns out absolutely light and super yummy.

You can fill it with freshly whipped cream, butter icing or quick and easy ready to use caramel.

Hope you try it out and have SUCCESS!!

Thursday, March 15, 2012

Mary and Martha

♥ I know that I have not been too chatty on my blogs of late, mostly photos with minimal descriptions.  Not too sure why but I guess I was just not quite ready to face another busy year.  I listened to a teaching today on Mary and Martha from the Bible.  It was a very good teaching on these lovely ladies from the Bible and which character you felt applied to you.  Why Jesus said “Martha, Martha, you are worried and troubled about many things; but one thing is needful:  for Mary has chosen the good part, which shall not be taken away from her,”  Luke 10v41, 42.  The teaching was on how to apply a little of a Mary nature into your lifestyle so as not to tire and burn out doing your Martha duties.  It was super appropriate to me, old Martha I am you know.

Ok so this brings me to the point of self reflection.  How much of what I do is Martha and how much is Mary.  It’s much like a scale, you need to live your life in balance.

A pertinent point was made:  Sunday, is the first day of the week, it’s a Mary day.  It’s the day you spend in worship, sitting at Jesus’ feet, (church) then relaxing with your family, chilling, doing a hobby or resting.  It’s the perfect way to start a week, recharging your batteries.
Monday:  This is my usual week day scenario.  From when I get up in the morning, Martha is in action.  I’d like to change that and be better prepared the night before and in the morning take time to enjoy my cup of tea before the run.  Possibly tea & toast in bed?  From 6.30am – 2pm, I’m off into the city traffic, getting children to school and myself to work, starting at 7.30am.  Better planning means leaving earlier, means sitting in less traffic, no stressing like Martha, and getting to work/school calmly and prepared to face the day.  Then doing my work in an organized, non frantic way until 2pm when I finish.  Slotted into my day are two 15 minute breaks, 10am tea and 12noon lunch. (Mary time)  Get home, relax for an hour or so, I always enjoy a nice cup of tea when I get home.  Then there is homework, supper, preparing lunches for the next day and then the wind down.  The wind down is the evening:   lamps play and important role in winding down after a busy day, relaxing music is preferable to an action packed TV show, reading and enjoying your family’s company.  This is good Mary time.
Tuesday, Wednesday, Thursday and Friday:  Repeat taking care not to become worried and troubled about many things like Martha but choosing what is needful for good health and of benefit to you and those around you.  A constant Martha attitude results in working so hard, no time to rest unless stressed (forced to rest), complaining about those who are resting and not helping but being prudent in times of busyness to delegate the work/chores.
Saturday:  I didn’t think much about Saturday, "it’s the weekend baby", you know.  But now without proper planning, Saturday can get filled up so quickly with all kinds of running around, and "doings".  Take care, plan your Saturday.

Does this not all make perfect sense.

Keep your heart a Mary heart when doing your Martha duties.

So in line with Mary thinking, I am going to share an awesome recipe with you to make life easier for you.  It is a 30 day Health Muffin recipe, 30 day, as it can last in your fridge for up to 30 days before baking.  Your life has just become easier.  Mary thinking with a little Martha involved.


30 Day Health Muffins


125ml Oil
2 Eggs
375ml (300g) Soft brown sugar
500ml Milk
5ml Vanilla Essence
375ml Cake Flour
500ml Digestive Bran
250ml Nuttywheat flour
10ml Bicarb. of Soda
5ml Salt
250g Fruit cake mix
250ml Dates, chopped

METHOD:
1.  Whisk the oil, eggs, sugar, milk and vanilla essence together.
2.  Add the remaining ingredients and mix well.
3.  Allow to stand overnight in the refrigerator in an airtight container.
4.  Spoon into well greased muffin tins and bake at 180C for 10 - 15 minutes.

NOTE:
*  This mixture can be left in the fridge for up to 30 days.
*  Bake fresh batches as needed.
*  You can sprinkle oat flakes on the muffins before putting them into the oven to bake.
*  These muffins are different to the bran muffins in that they have nuttywheat flour in and dates.

Thursday, June 2, 2011

Whip this cake up in a jiffy!

I am very excited to share this recipe with you, it literally takes just 4 ingredients, 5 if you are going to make it a chocolate cake instead of just a vanilla cake, so here goes from my tried and tested kitchen.

Ingredients:
125g Margarine
125g Sugar
125g Self Raising Flour
2 Medium Eggs(room temperature better as the cake will rise better)

Preparation:
1.  Heat the oven to 180C
2  Grease/Spray and Cook two 18cm cake tins, line with wax wrap if you prefer.  I used my oven proof rubberised type cake pans(if you can even call them that as they are rather floppy and I can't seem to see how they can be pans but, they most certainly make getting the cake out very easy) that I got from Clicks.
3.  Throw all the ingredients together, seriously yes, I didn't read the instructions and when I saw I had already added the flour in with the butter and only then added the sugar.  Give it all a jolly good beating, adding a little milk to get a nice dropping consistency, the result should be equally successful and YES, it was!
4.  Divide the mixture between the two cake tins, gently spreading with a spatula.
5.  Bake for 20 - 25 minutes, mine took just 15min in my thermofan oven.
6.  Allow to cool in tins and turn out.
7.  Sandwich the cakes together either with butter icing or whipped cream.

This little cake,(as it is a small cake) is perfect for a small family or even if it is just the two of you at home(children have left the home) as you will not have a huge cake to get through.  If you want to make it bigger, just double up and the result will be just fine.  If you prefer, you can just throw all the dough into one cake tin, bake and ice the top.

For the chocolate cake:
This is all purely Ala Janine as I figured if you substituted 25g of the self raising flour for cocoa powder, you would have a nice chocolate cake and YES again, so go ahead make a chocolate cake instead if you are craving chocolate!  When you make your butter icing, you usually need to add a little milk, instead of the milk make up a strong mixture of Ricoffy(or any other instant coffee), about a heaped teaspoon of coffee with a little bit of boiling water.  Add this to your butter icing for a nice chocolaty, coffee flavour, remembering that you will have added cocoa to your icing for the chocolate cake.

Disclaimer:
If your cake has turned out an absolute flop, this disclaimer protects the duplicator of this cake recipe from your demeanour in the kitchen and suggests you make sure that you added the eggs and more importantly, used "SELF RAISING" flour and not just ordinary cake flour.  It is suggested though that if you do use normal cake flour that you add 1 heaped teaspoon of baking powder to ensure a nice riser!

BAKE AND ENJOY!

Find original recipe at below link -
http://www.bbc.co.uk/food/sponge_cake

Sunday, March 27, 2011

IT'S A ROYAL AFFAIR

ROYAL CREAMS

Makes:  20
Baking time:  20 minutes
Oven temperature 160˚C

Biscuit Dough:
250 g Stork margarine
125 ml Icing Sugar
2, 5 ml Almond Essence
500 ml (2 Cups) Cake flour
125 ml Corn flour

Icing:
125 ml margarine
125 ml Icing Sugar
2, 5 ml Almond Essence
Pink Food Colouring (Optional)

Beat the margarine and icing sugar together until creamy.  Add the almond essence.  Stir in the cake flour and corn flour a little at a tie until the dough is soft but pliable. 
Press shapes through a biscuit gun or roll walnut-sized balls and shape into small rectangular shapes that are about 3mm high.  Using a fork, make an indentation into the biscuit dough. (Personally I prefer to use my biscuit gun)  Bake in a pre-heated oven for about 20 minutes until pale golden.  Cool before removing fro the baking tray.

Filling:  Beat the margarine and icing sugar together with the almond essence until creamy.  Add a drop of pink food colouring if you prefer.  Sandwich the biscuits together with the filling.

These are just as lovely as the bought Royal Creams and look so pretty in a glass jar with a pink ribbon tied around the neck of the bottle.  Make a pot of tea, pick out a pretty tea cosy, lay out the tray and you are sure to have a lovely tea party, even if it’s just you!


Strange how a teapot can represent at the same time the comforts of solitude and the pleasures of company.  ~Author Unknown

There is no trouble so great or grave that cannot be much diminished by a nice cup of tea.  ~Bernard-Paul Heroux
~ ~ ~
~ It is around 3.30 pm in the afternoon and I have finished my "Little bit of Irish" project, I have photographed it and packed it into a gift bag together with a few small goodies to send to the family in Ireland.  I will only be able to post a photo of it on Friday once I know the gifts have reached their destination for fear of it being spotted on my blog.  So till Friday then to view my "Little bit of Irish" project. ~


Wednesday, March 16, 2011

Brumpets, oh pardon me, Crumpets!

Today I am going to give you my “brumpet”, pardon me, my “crumpet” recipe and I will explain the whole “brumpet” thing to you just now. 

This recipe is from the “Cook and Enjoy It”, S.J.A. de Villiers recipe book.  I have two sisters and we each received a copy of the “Cook and Enjoy It” recipe book from our dad.   It has been a joy to me as I have learnt many a method of how to cook chicken, freeze vegetables, make jam, mix a substitute for baking powder etc from this book.  It has almost anything and everything in it, it is a treasure and I will most certainly give my daughters a copy too one day.  Just in my first year of marriage, my neighbour asked to borrow my recipe book, I was a bit uneasy about lending my book out, however insisted on having it back the very next day.  Some things are just too personal and special to lend out and I have never lent it out again.  I have learnt the art of saying no by offering an alternative when my answer is actually no. 

Crumpets
Ingredients
¾ Cup Sugar
1 Desert Spoon Butter/Margarine
2 Eggs
1 ½ Cups Milk
2 Cups Cake Flour
1 Heaped Desert Spoon Baking Powder
1 level Teaspoon Bicarbonate of Soda


Cream butter and sugar, add eggs, beat well then add the milk and flour alternatively, lastly adding the Baking powder and sifted Bicarb.  (Not nice to bite on a piece of bicarbonate of soda clump that did not get blended in)  Mix well and drop spoonfuls on a greased electric frying pan or griddle.  Turn over once.  (Wait for bubbles/holes to appear in the crumpets then you know they are ready to turn)


There are always guinea pigs in my family eagerly awaiting to sample the first crumpets to make sure they taste good!
Now what on earth is the whole "brumpet" issue?  A couple of years ago we were having home cell (fellowship group) at our house for which I made crumpets for out guests.  Our home cell leader at the tie and a very good friend commented that the crumpets were delicious, and were they "brumpets"?  I said I had not heard of "brumpets" but thanks for the compliment on the crumpets. It was not the first time he had asked if they were "brumpets", it came up every time we were together that I made crumpets.  I think that "Brumpets" were the name of a packet of a ready mix one bought at the shop to make crumpets with by just adding the wet ingredients.


If you are fortunate enough to have any remaining crumpets from this batch, they are extremely yummy when buttered and sandwiched together to have in your lunch box the next day at school or work, but like I said only if you are lucky enough to have left overs!


  ~ ~ ~ ENJOY ~ ~ ~

Monday, February 28, 2011

Cheery Chocolate Chiffon

My faithful laptop of four years plus just crashed on me, my life(or so it feels) is stored on that computer and needless to say it will cost just slightly short of a new laptop to repair it thus, to the scrapyard she goes.  I have been very down about the whole thing as finances are a bit short to be able to just drop the computer off at the shop and say "fix" or simply just purchase a replacement! So old "Gertrude" will have the stored information extracted from her and I will simply just have to load it all on the standard computer when that too is fixed! (Two computers crashing all in one day is a BIT MUCH!)

Thus to cheer myself up and not to get too depressed as I cannot think of a positive thing to say right now, I have decided to post my favourite and most spectacular Chocolate Chiffon Cake recipe, which by the way is an "Anjela Day" recipe - "Websites I like".  There is nothing better than cheering yourself up with a nice cup of filter coffee and;  yes ... a slice of Chocolate Chiffon Cake. 


Ingredients:
120ml Cocoa
100ml Hot Water
375ml Cake Flour
10ml Baking Powder
190ml Castor Sugar (Now I'll let you in on a little secret here, I place my normal sugar in my coffee grinder and make my own castor sugar)
90ml Oil
50-60ml Cold Water
6 Eggs, separated (Room temperature eggs make the the cake rise better than ones taken out the fridge)
Extra 100ml Castor Sugar (For beating into the egg whites)


Chocolate Icing
200g Dark Chocolate (or a slab of milk chocolate)
150ml Cream
Strawberries to decorate

Combine cocoa and hot water, mix until smooth and then cool.
Sift the flour, baking powder and castor sugar into a bowl.  Make a well in the centre and add in the oil, egg yolks, cocoa and enough cold water to make a smooth batter. 
Beat egg whites until stiff and gradually beat in the extra sugar. 
Take a spoonful of the egg white mixture and mix it into the chocolate mixture to loosen the mixture.  Then carefully fold in the remaining egg white and blend well. 
Pour mixture into a 24cm chiffon pan (the big cake ring pan with a hole in the middle)and bake at 180°C for 45 - 50 minutes. 
Turn the pan upside down and leave to cool completely before removing from the pan.(do not be tempted to try bang the cake out before it has cooled or else it will tear)
Chocolate Icing:  Combine the chocolate and cream in a glass bowl.  Place over simmering water and stir until chocolate is melted and mixture is smooth.  Remove from heat and allow to cool and thicken.  Pour over cake and place in the fridge to set.  Decorate with strawberries.

Friday, February 18, 2011

Apple Crumble

A much loved recipe I received from a friend of the family, Aunty Lynne Baker,  the Bakers have been friends with my husbands parents since they were all children.  This is the most delicious Apple crumble I have ever had.  I just hate the ones bought from the shop, when you cut into them, the dough at the base is still raw.... not nice.  But this one will never disappoint.... ENJOY!
1. 125g Margarine, 1/2 Cup Castor sugar, 2 t Vanilla Essence, 1 Egg
2.  2 Cups Flour & 1 t Baking Powder or (2Cups Self Raking flour).
Mix ingredients of (1) together, then add ingredients of (2).
Place 1/3 of your stiff dough in freezer, and the other 2/3 dough in bottom and side of pie dish. Bake at 180 C for approx 5 min.
One big can Pie Apples: chop together with sugar and cinnamon to taste, place in pie dish and grate 1/3 of freezer dough on top.
Continue baking for approx 20 - 25 min.
Sprinkle Castor Sugar on top of pie and serve with cream or ice cream